Learning from the hands on // Aprendiendo de poner las manos en la masa

After long research we realized we had different ways to get the shapes we need and difference diameters of the wires. Id we want to get the enough power to massage the calf muscle we will have to reconsider the lengths, diameters and current through the wire.

The one we ordered from the US didnt have the enough strength to move the kapton tape, after a lot of testing and iterating as we said in the last post we learned about all this requirements.

Last but not least, even though it’s not the wire to simulate a massage we could learn a lot about how to manage the cables, also learned to program in Arduino and work with electronics.

__________________________

Después de una investigación larga nos dimos cuenta que teníamos diferentes maneras de obtener las formas que necesitábamos como también los diámetros de los cables. Por otro lado, si queremos conseguir el poder suficiente para masajear el músculo de la pantorrilla tendremos que reconsiderar las longitudes, diámetros y corriente a través del alambre.

El único que pedimos desde los EE.UU. no tiene la fuerza suficiente para mover la cinta Kapton, después de un montón de iteración como se menciona en el post anterior hemos aprendido acerca de todos estos requisitos.

Por último, a pesar de que no es el hilo adecuado para relamen simular un masaje, fue muy útil para aprender mucho acerca de cómo administrar los cables, también aprendimos a programar un poco de Arduino y trabajar con la electrónica que hay detrás.

Benja -.

Connecting Wires // Conectando Cables

We have been working for three continued days. After taping every wire we had to start doing tests. At first, no current was useful to get the wire to move using 9V battery. Secondly, we tried to get it to move with a lot of heat. And it actually turned out to get to its memorized shape. Thridly, with a higher Voltage we were able to get it move a bit, after that we started iterating…

______________

Hemos estado trabajando por tres días de forma continua. Despues de cubrir con Kapton Tape tuvimos que empezar a hacer pruebas. Primero, ninguna corriente fue suficiente para lograr que se movieran. Segundo, intentamos que se moviera von mucho calor y lo logramos, luego de un segundo recordó la forma momorizada. Tercero, con un mayor voltaje pudimos hacer wue se moviera un poco, luego de esto comenzamos a iterar.

Benja-.

“The Final Presentations” // “La presentación Final”

It has been a long semester but we are now reaching the final stages of our project. This week we have t our GD3 and December 10 we have to present in front of authorities , teachers, students and companies linked to the DI -lab .

To achieve this wehave to present the final prototype, a poster summarizing our project and ofcourse the final presentation.

StoryBoard

StoryBoard

The final prototype simulates almost completely our final product , aesthetics achieved with sponges (trip backpack style) and different fabrics with different properties . A stiffer on the outside, an insulation for the device and another to stiffen . Moreover , the system lists all components but does not work properly. Yet we know that the technology works and only requires more time and study.

The poster presented simply and ordered our work during the semester , ie , our fieldwork , analysis of the data , the main factors affecting our user, timeliness, deep vein thrombosis , functionality, aesthetic and finally our final product. Showing as we reached our final solution and as validated in the market.

//

Ha sido un largo semestre pero ya estamos llegando a la recta final de nuestro proyecto. Esta semana 3 tenemos nuestro GD3 y el 10 de diciembre tenemos que presentar frente a autoridades, profesores, alumnos y empresas vinculadas con el DI-lab.

Para lograr esto debemos presentar el prototipo final, un poster que resuma nuestro proyecto y claramente la presentación final.

El prototipo final simula casi por completo nuestro producto final, la estética se logró con esponjas (tipo mochila de viaje) y distintas telas con propiedades distintas. Una más rígida en el exterior, una aislante para el dispositivo y otra para dar rigidez. Por otra parte, el sistema tiene todas sus componentes listas pero no funciona correctamente. Aun así se sabe que la tecnología funciona y solo se requiere más de tiempo y estudio.

El poster presentará de manera simple y ordenada nuestro trabajo durante el semestre, es decir, nuestro trabajo en terreno, el análisis de la data, los principales factores que afectan a nuestro usuario, la oportunidad, la trombosis de vena profunda, la funcionalidad, la estética y finalmente nuestro producto final. Mostrando como logramos llegar a nuestra solución final y como se valida en el mercado.

Vicente.

Preparing the system

These las two weeks have been mainly focused on the Muscle Wire.
Because is a new technology theres not abundant material as you can usually find in the internet for a lot of subjects so we’ve been talking with Emily and Alex to try to understand how it works, they’ve had some troubles so the wires haven’t moved yet., we are looking forward to finally get them to finally  remember the “taught” shape.
We taped the muscle wires, tried them with heat and they worked but they are not yet working using electricity. Although we have our Arduino programming code ready we need to get the isolated movement of each wire, after that we are gonna assemble everything together, set it with a permanent Arduino, use a rechargeable battery and will start massaging the user.

Heres two simple educative videos that show a Muscle Wire working in the right way.

Link 1: https://www.youtube.com/watch?v=Hs2aHC3L4Ik

Link 2: https://www.youtube.com/watch?v=zT1iDtDvx58

Español

Estas las dos semanas se han centrado principalmente en el Muscle Wire. Debido a que es una nueva tecnología el material para aprender no es abundante como normalmente se puede encontrar en Internet para una gran cantidad de temas. De todas maneras, hemos estado hablando con Emily y Alex para tratar de entender cómo funciona, que han tenido algunas dificultades por lo que sus Muscle Wires aún no logran moverse.

Con Vicho estamos  ansiosos esperando que finalmente el cable llegue recordar la forma “enseñada” inicialmente .  Los probamos con calor y funcionaron pero aún no estamos trabajando el uso de electricidad. Lo bueno es que tenemos nuestro código de programación Arduino listo, pero primero tenemos que conseguir el movimiento aislado de cada cable , después de que eso vamos montar todos los cables, agregarle,  un Arduino permanente , la batería recargable y por fin comenzaremos el masaje al usuario.

Aquí dejo dos links para entender un poco más como luce el Muscle Wire funcionando

Link 1: https://www.youtube.com/watch?v=Hs2aHC3L4Ik

Link 2: https://www.youtube.com/watch?v=zT1iDtDvx58
Benja-.

The muscle wire arrived

After waiting for a week we received the materials sent by Emily and Alex.

We have to start constructing the system, programming the Arduino, giving the final form to the wire, sewing everything together to put it inside our product.

Alex and Emily have had some problems so they decided to simulate the movement using LED lights.

Time to work!

// Spanish version

Después de esperar una semana recibimos los materiales enviados por Emily y Alex .

Tenemos que empezar a construir el sistema , programar el Arduino , dando la forma final al hilo, cocido todo junto para ponerlo dentro de nuestro producto .

Alex y Emily han tenido algunos problemas por lo que decidieron simular el movimiento con luces LED.

A trabajar!

Benja-.

“Simulate a massage”// Simular un masaje

We are working on the functionality of our product with the aforementioned Muscle Wire, but to achieve a good result we had to understand what the procedure was performed by physiotherapists when promoting blood circulation in the gastrocnemius muscle or calf. In the following video samples 3 possible exercises to be performed to achieve a good result.

Video:

Our product will try to mimic as close as possible the last one, realizing every 45 minutes for just 5 minutes approximately. This will be achieved with the pressure generating Muscle Wire fingers are simulating the physical therapists and massage these start from the bottom up.

//

Estamos trabajando en el funcionamiento de nuestro producto con los ya mencionados Muscle Wire, pero para lograr un buen resultado tuvimos que entender cual era el procedimiento que realizan los kinesiólogos a la hora de promover la circulación sanguínea en el musculo del gemelo o gastrocnemios. En el siguiente video se muestras los 3 ejercicios posibles que se deben realizar para lograr un buen resultado.

Video:

Nuestro producto intentara imitar lo más posible al último ejercicio, realizándolo por 5 minutos cada 45 minutos aproximadamente. Esto se logrará generando presión con los Muscle Wire simulando que son los dedos del kinesiólogo y que estos inician el masaje desde abajo hacia arriba.

Vicente.

“The Muscle Wires”

The functionality is almost ready. Emily and Alex found an advanced and innovative technology that will meet our goal, this technology is called Muscle Memory Wires .

These unique metals made from combinations of two or more elements, exhibit hardness and elasticity properties that change radically at distinct temperatures. First observed in 1932 in a Gold-Cadmium alloy (expensive and toxic), interest and research greatly expanded upon the discovery of a Nickel-Titanium (lower cost and non-toxic) alloy in the 1960’s.

After alloying and basic processing, Muscle Wires can be formed into a shape (for example, a coil spring), and then set to that shape by a high heat treatment. When cooled, they may be bent, stretched or deformed (within limits) and then with subsequent moderate heating (well below the heat setting temperature), they can recover some or all of the deformation – the move when heated!

Muscle Wires have found use in everything from space missions (Clementine, Pathfinder and many more) to floral arrangement (animated butterflies, dragonflies and fairies). And cell phone antennas, orthodontic braces and even eyeglasses use Muscle Wires® wires for their extreme flexibility.

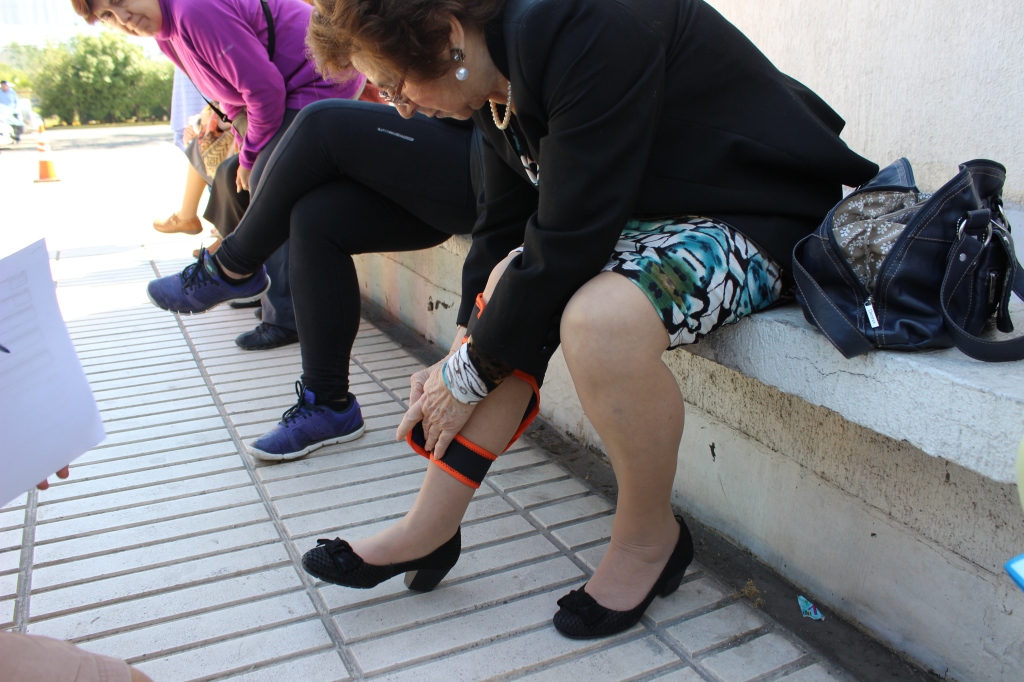
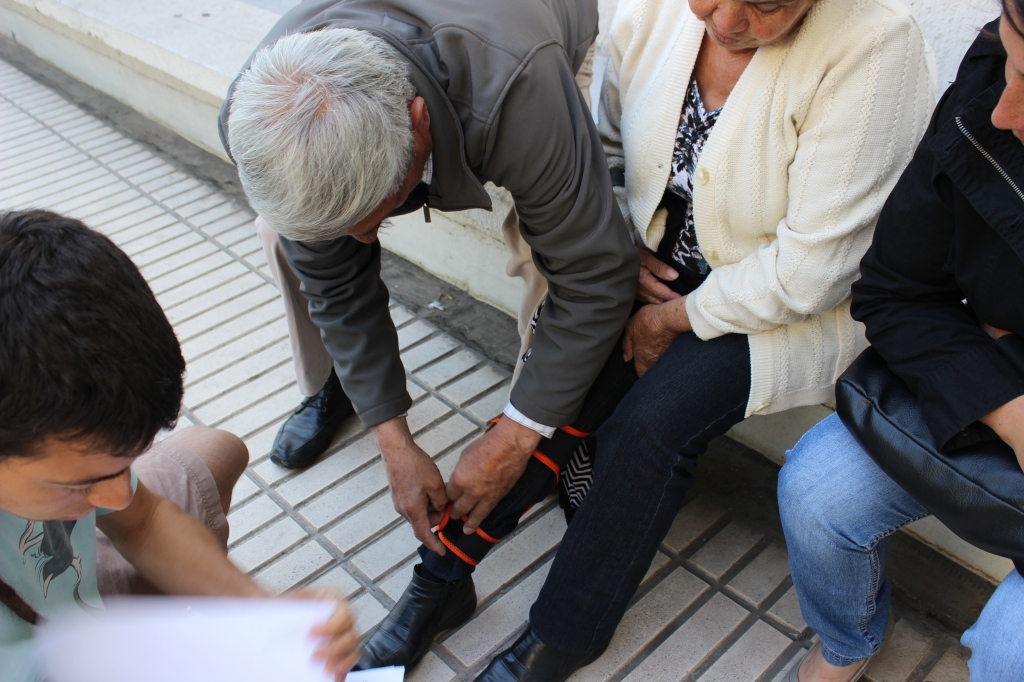
This technology will be perfect for our work , as Alex and Emily discovered that they could mold this material to simulate the fingers of a physical therapist. This will be achieved by programming a Arduino and connecting cables so as to achieve the twin exert pressure by deformation of Muscle Wires.

//

El funcionamiento está casi listo. Emily y Alex encontraron una tecnología avanzada e innovadora que permitirá cumplir con nuestro objetivo, esta tecnología se llama Muscle Memory Wires.

Estos metales únicos hechos a partir de combinaciones de dos o más elementos, cuya dureza de exposiciones y propiedades de elasticidad cambian radicalmente a temperaturas distintas. Fue estdudiada por primera vez en 1932 en una aleación de oro – Cadmio (caro y tóxico) , el interés y la investigación se expandieron considerablemente en el descubrimiento de una aleación de níquel – titanio ( no tóxico menor costo y ) en la década de 1960 .

Después de aleación y el procesamiento básico, el Muscle Wires se puede formar en una forma (por ejemplo, un resorte helicoidal), y luego dejar esa forma con un tratamiento térmico elevado. Cuando se enfría, pueden ser dobladas, estirado o deformado (dentro de límites ) y luego con calentamiento moderado posterior (muy por debajo de la temperatura de fijación) pueden recuperar parte o la totalidad de la deformación.

A los Muscle Wires se le han encontrado uso en todo, desde las misiones espaciales (Clementine , Pathfinder y muchos más ) a arreglos florales ( animados mariposas, libélulas y las hadas). Y las antenas de teléfonos celulares, aparatos de ortodoncia e incluso gafas utilizan cables estos cables por su flexibilidad extrema.

Esta tecnología será ´perfecta para nuestro trabajo, pues Alex y Emily descubrieron que podían moldear este material para que simular los dedos de un físico terapeuta. Esto se logrará programando en un Arduino y conectando los cables de tal manera que se logre ejercer presión en el gemelo mediante la deformación de los Muscle Wires.

Vicente.

Preparing for Demo Day

Sooooo,

We are getting to the final steps of this big project. With big challenges approaching. On two more days we’ll be presenting to a lot of people in a contest known as Demo Day.

In this contest we are meeting a bunch of other groups of people that have been working on things related with innovation. We are very excited to have the chance to participate in this and also very happy to show other students, teachers and friends what we’ve been working this whole semester.

Despite the fact that there’s about 30 other groups participating in this contest we are convinced that we can win. The other good thing is to have our first public opportunity to talk about this disease that we’ve learned a lot about, DVT.

//
Bueeeeno,

Estamos llegando a los últimos pasos de este gran proyecto . Con grandes desafios por delante. En dos días más vamos a estar presentando a un montón de gente en un concurso conocido como Demo Day . En este concurso estamos compitiendo con un montón de otros grupos de personas que han estado trabajando en cosas relacionadas con la innovación . Estamos muy emocionados de tener la oportunidad de participar en esto y también muy feliz de mostrar a otros estudiantes, maestros y amigos lo que hemos estado trabajando todo este semestre. A pesar del hecho de que hay cerca de 30 otros grupos que participan en este concurso estamos convencidos de que podemos ganar . Lo otro que nos tiene muy contentos es nuestra primera oportunidad para hablar de forma pública de esta enfermedad que hemos aprendido mucho acerca, DVT.

IMG_0111

IMG_0109 (1)

Preparing the 3 minute presentation

Benja.-

Looking for innovations In the design

After the presentantion of our prototype to the class we realized it needs some creative solutions to some of the components of our Wearable.

Our research and creative thinking will focus on:

1) Union

2) Smoothness of the material in contact with the skin

3) System to support the batteries

4) Simple signs to show users hot to put the device

Some of the inspirstion to  come up with solutions  this problem that we are facing are going to come from the analysis of the Mountain High Tech Clothes and Equipment we believe they have been very succesful to come up with original, highly efficient, light and very good looks.

benja.

“Time to get new insights” // “Es tiempo de tener nuevos insights”

This week we present our second aesthetic prototype, which was formed with the selected materials that we choose in our material testing and study conducted earlier. Once we had the product ready, we begin our testing in the San Joaquin Medical Center.

IMG_3858

Outside of the product

IMG_3859

Side in contact to the skin

Our main goal was to find all the flaws that our product has both intuitive and aesthetic issues. That is why our testing included in delivering the product without saying what it was for and it was, so we could see if the product is understood without any background. As we assumed, many people did not know where the product (arms, neck, back, knees) was in the body, and if they found out they did not know which side of the product was in contact with skin and which outside. We realized that a good way to give independence to the product is to add a small instructional infographic of how to put it on.

IMG_3874

Testing in SJCM

We also wanted to know if the prototype was snug to the leg. In testing we found that the velcro worked great and had no problems in the minute you put it on, nor the product slipped in the leg. The problem we found was that a part of the prototype surface skin contact was lost, so our final product must achieve optimizes this topic.

IMG_3893

Testing the product

We still have far to go and little time to make progress, which is why we must focus on our weaknesses to achieve a concrete and solid result.

//

Esta semana presentamos nuestro segundo prototipo estético, el cual fue conformado con los materiales seleccionados en nuestro testeo y estudio de selección de materiales realizado anteriormente. Una vez te tuvimos el producto listo, comenzamos nuestro testeo en el Centro Médico San Joaquín.

Nuestro principal objetivo era lograr encontrar todas las falencias que tuviera nuestro producto, tanto en temas intuitivos como estéticos. Es por ello que nuestro testeo comprendía en entregar el producto sin decir para que servía ni que era, así podríamos ver si el producto se entiende sin un background sobre él.  Como supusimos, muchas personas no sabían dónde colocarse el producto (brazos, cuello, espalda, rodillas), y si lo descubrían no sabían qué lado del producto iba en contacto con la piel y cual exteriormente.  Comprendimos que una buena forma de entregarle independencia al producto es agregar una pequeña infografía instructiva de cómo ponérselo

IMG_3890

Muestra de perdida de superficie de contacto.

.

También queríamos saber si el prototipo quedaba bien ajustado a la pierna. Con el testeo comprobamos que el velcro funcionaba de maravilla y que nadie tuvo problemas al minuto de colocárselo, ni tampoco el producto resbaló en la pierna. El problema que encontramos, fue que en una parte del prototipo se perdía superficie de contacto en la piel, por lo que nuestro producto final debe lograr optimizar ese tema.

Nos queda mucho por delante y poco tiempo para lograr avances, es por ello que debemos enfocarnos en nuestras falencias para lograr un resultado concreto y sólido.

Vicente.